Tuesday, July 30, 2013

Modern Outdoor Furniture Tutorial: Part 2

Cushions:


For the cushions I usually use balsa wood.  It's really light weight and easy to cut.


 First I covered the ends with a small piece of fabric and use a little extra bit of glue at the corners and pinch the corners closed.
 Once the glue is dried I snip off the extra fabric.

Then I cut a piece of fabric roughly the right size to cover the rest of the cushion the press the edges under to the correct size.  I found this awesome tiny iron at JoAnn Fabrics.  I believe it's for pressing quilting seams.  Of course I used a 40% off coupon.
 
 I line up the fabric then glue just along the edges.
 
 Finished cushion.
 
Here are the cushions on the chair base.
 
For this sofa, I used Carol's (Pepper from Mitchy Moo Miniatures) method of upholstering.  She has a great tutorial.
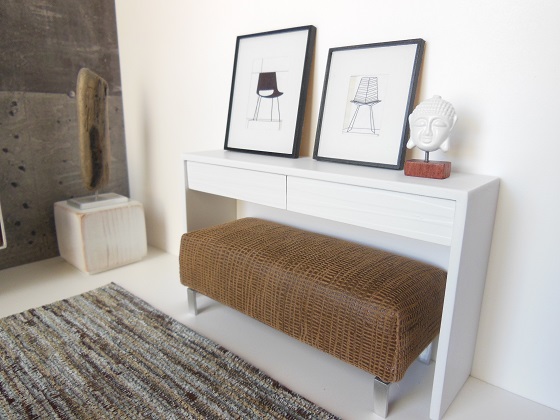
 
 
Legs:
 
For the legs, I usually use dowels or aluminum tubing.  I was out of the right sized aluminum tubing so I used an aluminum channel from the hardware store.
 
 Using a metal cutting bit on my little saw from Harbor Freight Tools, I cut small pieces from the aluminum channeling.

Then I filed the rough edges.
 
 Then I glued the legs to the bottom using Quick Grip.
 
Voila!

Sunday, July 28, 2013

Modern Outdoor Furniture Tutorial: Part 1

 I haven't been able to find any mini outdoor furniture that has modern lines...at least that I can afford.  So, I decided to make my own.  This is a first, so I hope it turns out OK.

First, I  made a chair frame.  This one is made from some left over 3/8" MDF.
 
Next I found a woven placemat.  This one is from Home Goods.

 
Then, I spray painted the chair frame the same color as the placemat.

 
Then I cut out pieces to fit each side of the chair frame out of the placemat.

 
I smeared a bit of glue on a piece with a stiff paint brush. I use Alleen's Fast Grab or Quick Dry because it holds well and dries clear.

 
I glued it on the chair frame and did the same with all of the pieces that I cut out.

 
Here you have the main part of the chair.

 
Next:  the cushions and chair legs.
 

Monday, July 15, 2013

...And the Minismodernas winners are:

The winners of the Minismodernas Anniversary Contest are: 


First place:  Carol of Mitchy Moo Miniatures
 
and
 
 
And second place: Gabrielle of  In the Twelfth Scale on Etsy. See her pictures on Flickr
 
Congrats to both:  You did an awesome job!
 

SUMMER SALE AT PRD MINIATURES!!!!

PRD Miniatures is having a summer sale.  If you like modern miniatures, you HAVE to check it out!


Thursday, July 11, 2013

Midcentury Modern Misery Update

Status: Chair Arm Repaired!


It's not exactly like new, but close. Also, thanks to Dana at Mid2Mod I found the perfect fabric.  With any luck, I will have the chair finished this weekend!

Wednesday, July 10, 2013

Slice-Tilt-Vortex

Recently, I bought the Tilt and Vortex table kits from feYerwerks on Etsy. They were only $10.00 each. 


 I'm going to start with the Vortex table.  I received two envelopes and this is what was inside of each.  You can imagine what I'm thinking...are there any instructions? So, I sent a message on Etsy to see if there were any.  He was wonderful and messaged me back giving me an idea how to put it together along with a phone # in case I had any problems and told me that if I broke any of the fragile little pieces while trying to assemble it, he would send me a new piece. 

 
 It looks a little daunting, but it's pretty easy once you get it.
 
 I sorted and laid out all the pieces.  The "leg" pieces were all numbered 1-6.  You may need some readers for this.
 
 The clover looking pieces were labeled A-F and they each had at least a number one so you know where to start.
 
 Once I got the first few pieces together, it was pretty easy, but you really need to be gentle with it.
 
 Here it is...The Vortex


This photo is from the store on Etsy: I still have to decide what color to paint them.
 

Next is the Tilt coffee table.  It was pretty much the same except that I needed to use my exacto knife to get all of the pieces separated.

 I painted it a dark charcoal grey.
I can't wait to use these in a scene.  I can totally see why there is an upcharge to buy these already assembled.  It took about an hour or so for each table-a little longer for the Tilt table.

There are also some VERY cool other miniatures on the feYerwerks shop such as miniature shipping crates, bridges, real life things and even miniature houses.